In short
- A good backbend spreads the curve along the whole spine. Length comes first, then lift.
- The poses below run roughly from gentle prone shapes (Cobra, Sphinx, Locust) to deeper ones that need open shoulders and hips (Camel, Bow, Wheel).
- Warm up the hips, shoulders and upper back before you bend, and finish with a neutral or gently rounding counterpose.
- Sharp pain in the low back or neck is a signal to back off. Measure progress by steadiness and breath.
Before you start
In a backbend the spine extends: the front of the body lengthens and the back of the body shortens. The lower back (lumbar spine) and neck bend easily, while the upper back (thoracic spine) is stiffer because the ribs attach to it. Left to its own habits, the body tends to fold at the easiest point, which is usually the low back. Most of the cues on this page aim to spread the bend more evenly, so the chest lifts and the lower back stays long.
Warm up first
Backbends feel better after 10 minutes or more of movement. A few rounds of cat and cow, two or three Sun Salutations, a low lunge for the hip flexors and a few shoulder openers are enough. Tight hip flexors pull the pelvis forward and push the bend into the lower back, so lunges are especially useful before Camel, Bow and Wheel.
Principles for every backbend
- Lengthen, then lift. Reach the crown of the head and the tailbone away from each other before you arch.
- Use the legs. Pressing through the feet or tops of the feet gives the pelvis a stable base. Avoid gripping the buttocks so hard that the thighs turn out.
- Keep the neck part of the curve. Let the head follow the upper back. Dropping it back sharply compresses the neck.
- Breathe steadily. Deep backbends restrict the breath a little. If you cannot breathe smoothly, you have gone further than you can hold.
- Build gradually. Several short repetitions of a pose usually serve you better than one long, strained hold.
For more on how the spine moves, see Anatomy & Alignment. If you have a spinal condition, recent injury or are pregnant, read Practicing Safely and check with a health professional before working on deeper backbends.
Cobra Pose
Bhujangasana boo-jang-GAHS-uh-nuh
- Meaning
- Serpent or cobra pose
- Level
- Beginner
- Hold
- 3–5 breaths, 2–3 rounds
- Works
- Back extensors, chest, front of shoulders, abdomen
Cobra is a prone backbend in which the chest lifts off the floor while the hips and legs stay grounded. The low version, with little weight in the hands, teaches you to lift with the back muscles. It appears in many versions of the Sun Salutation.
How to do it
- Lie on your front with your legs hip-width apart and the tops of your feet on the floor.
- Place your hands under your shoulders, fingers spread, elbows close to your ribs.
- Press the tops of the feet and the pubic bone gently into the mat and reach your legs back.
- Inhale and lift your head and chest, leading with the breastbone. Use your back first, then press lightly into your hands.
- Draw your shoulders back and down, away from your ears, and keep your elbows bent.
- Keep the back of the neck long, with your gaze forward and slightly down.
- Exhale to lower slowly, and rest with one cheek on the mat before repeating.
Common mistakes
- Pushing up with straight arms and hanging in the lower back
- Shoulders shrugged toward the ears
- Throwing the head back
Make it easier
- Stay very low ("baby cobra"), lifting only a few inches
- Widen the legs slightly to ease the lower back
- Try Sphinx instead
Go further
- Hover the hands off the floor to test back strength
- Straighten the arms gradually while keeping the pubic bone down
Skip or modify if: you are pregnant (lying on the belly becomes uncomfortable and is generally avoided later in pregnancy), have a recent abdominal surgery, or have a low-back condition that worsens with extension.
Sphinx Pose
Salamba Bhujangasana sah-LAHM-buh boo-jang-GAHS-uh-nuh
- Meaning
- Supported cobra pose
- Level
- Beginner
- Hold
- 5–10 breaths, or 1–3 minutes
- Works
- Upper back, chest, abdomen, gentle lumbar extension
Sphinx is a mild backbend with the forearms on the floor. Because the arms support the chest, you can stay longer and breathe into the shape. "Sphinx" is a modern English name, and the pose is often labeled Salamba Bhujangasana; in Yin Yoga it is held for several minutes.
How to do it
- Lie on your front with legs hip-width apart and the tops of the feet down.
- Place your elbows under or slightly in front of your shoulders, forearms parallel, palms down.
- Press the forearms down and draw them gently back toward you, which lifts and moves the chest forward.
- Let the belly rest on the floor, and let the legs relax or reach them back lightly.
- Broaden across the collarbones and let the shoulder blades settle down the back.
- Keep your neck long and gaze straight ahead.
Common mistakes
- Sinking between the shoulder blades
- Elbows far behind the shoulders, which strains the low back
- Chin jutting forward
Make it easier
- Move the elbows further forward to lower the chest
- Place a folded blanket under the hips or pelvis
Go further
- Bring the elbows slightly closer to the body
- Hold for 3 minutes with slow nasal breathing
Skip or modify if: you are pregnant, feel pinching in the lower back (lower the chest or move the elbows forward), or have shoulder pain when bearing weight on the forearms.
Locust Pose
Salabhasana shah-lah-BAHS-uh-nuh
- Meaning
- Locust pose
- Level
- Beginner
- Hold
- 3–5 breaths, 2–3 rounds
- Works
- Back extensors, glutes, hamstrings, back of shoulders
In Locust you lift the chest, arms and legs off the floor with no help from the hands. It is one of the best ways to build the back strength that supports deeper backbends and everyday posture. It is harder than it looks, so expect a modest lift.
How to do it
- Lie on your front with your forehead on the mat, arms by your sides, palms facing down or in.
- Reach your legs back so the knees lift slightly, with the feet hip-width apart.
- Press the pubic bone lightly into the floor to keep the lower back long.
- Inhale and lift your head, chest, arms and legs together.
- Reach the fingertips toward the feet and draw the shoulder blades toward each other.
- Keep the gaze on the floor a little ahead of you so the neck stays long.
- Exhale to lower, rest with the head turned to one side, then repeat.
Common mistakes
- Lifting the chin high and cramping the neck
- Bending the knees to get the feet higher
- Holding the breath
Make it easier
- Lift only the upper body, or only the legs
- Lift one leg and the opposite arm at a time
Go further
- Interlace the hands behind the back and lift them
- Reach the arms forward alongside the ears
Skip or modify if: you are pregnant, have recent abdominal or back surgery, or have a back injury that is aggravated by lifting the legs.
Bridge Pose
Setu Bandha Sarvangasana SAY-too BAHN-duh sar-vahn-GAHS-uh-nuh
- Meaning
- Bridge-building all-limbs pose
- Level
- Beginner
- Hold
- 5–10 breaths, 2–3 rounds
- Works
- Glutes, hamstrings, back extensors, hip flexors, chest
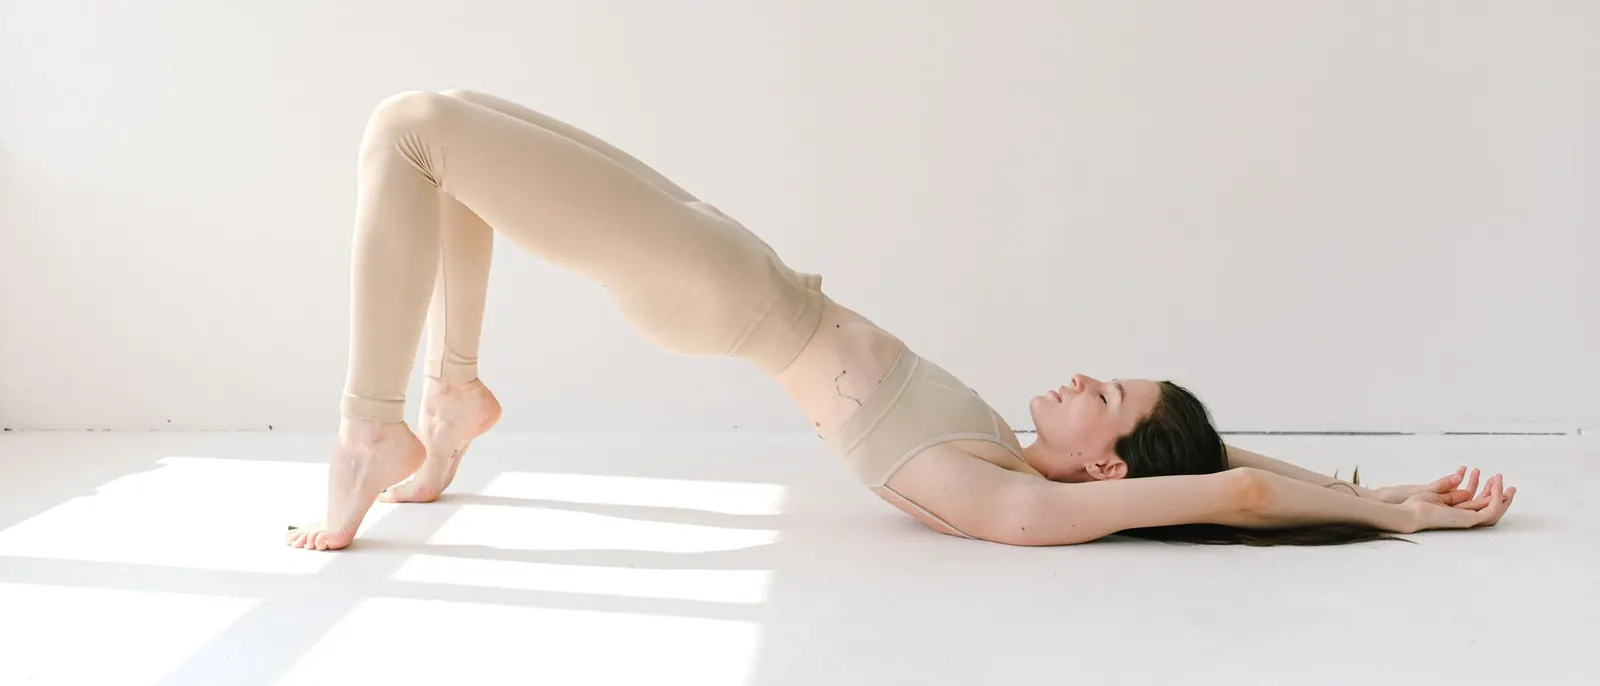
Bridge lifts the hips from a lying position with the feet on the floor. The legs do most of the work, which makes it a friendly backbend for beginners and a useful warm-up for Wheel. For a passive version with a block under the pelvis, see Supported Bridge.
How to do it
- Lie on your back with knees bent and feet flat, hip-width apart and parallel, heels a hand's length from the buttocks.
- Place your arms alongside your body, palms down.
- Press evenly through both feet and lift the hips on an inhale.
- Keep the knees over the ankles and pointing straight forward, without letting them splay out or knock in.
- Roll the shoulders under one at a time so the chest lifts toward the chin. Interlace the hands under you if that is comfortable.
- Keep the back of the neck off the floor slightly and the head still. Do not turn it while in the pose.
- Exhale and roll down slowly, one section of the spine at a time.
Common mistakes
- Knees drifting apart
- Pushing the hips high by gripping the buttocks and arching the low back
- Turning the head to look around
Make it easier
- Lift only as high as the legs can hold
- Squeeze a block between the thighs to keep the knees aligned
Go further
- Hold the ankles or edges of the mat
- Lift one leg toward the ceiling while keeping the hips level
Skip or modify if: you have a neck injury (place a folded blanket under the shoulders, or use the supported version), or are in later pregnancy and uncomfortable lying on your back.
Camel Pose
Ustrasana oosh-TRAHS-uh-nuh
- Meaning
- Camel pose
- Level
- Intermediate
- Hold
- 3–5 breaths, 1–3 rounds
- Works
- Hip flexors, quadriceps, abdomen, chest, front of shoulders
Camel is a kneeling backbend with the hands reaching toward the heels. It stretches the whole front of the body, from the thighs to the throat, and asks for open hip flexors and shoulders. The key skill is lifting the chest up before taking it back.
How to do it
- Kneel with the knees hip-width apart and the thighs vertical. Tuck the toes under to raise the heels, or keep the tops of the feet down.
- Place your hands on the back of your pelvis, fingers pointing down.
- Press the shins down and lengthen up through the spine on an inhale.
- Lift the breastbone and draw the elbows toward each other so the chest opens.
- Keep the hips moving forward over the knees as you begin to bend back.
- If comfortable, reach one hand and then the other to the heels. Keep the chest lifting.
- Keep the chin slightly tucked, or let the head release back only if the neck feels easy.
- To come up, bring the hands back to the pelvis and rise by leading with the chest, head last.
Common mistakes
- Hips sliding back behind the knees
- Collapsing into the lower back to reach the heels
- Dropping the head and coming up with the head first
Make it easier
- Keep the hands on the back of the pelvis
- Place blocks outside the ankles to rest the hands on
- Pad the knees with a folded blanket
Go further
- Untuck the toes and hold the soles of the feet
- Work toward keeping the thighs vertical throughout
Skip or modify if: you have a neck injury (keep the chin tucked), a low-back or knee injury, uncontrolled high or low blood pressure, or feel dizzy. Come out slowly and sit for a few breaths afterward.
Bow Pose
Dhanurasana dah-noo-RAHS-uh-nuh
- Meaning
- Bow pose
- Level
- Intermediate
- Hold
- 3–5 breaths, 2–3 rounds
- Works
- Quadriceps, hip flexors, chest, front of shoulders, back extensors
In Bow you lie on your front, hold the ankles and kick the feet into the hands to lift the chest and thighs. The body forms the curved bow and the arms are its string. The lift comes mostly from the legs pressing back.
How to do it
- Lie on your front, bend your knees and bring your heels toward your buttocks.
- Reach back and hold the outer ankles, one at a time if needed.
- Keep the knees about hip-width apart. Avoid letting them spread wider as you lift.
- Inhale and press the feet back into the hands. Let that action lift the chest and thighs.
- Keep the arms straight and let them be pulled rather than doing the pulling.
- Broaden the collarbones and keep the neck long, gaze forward.
- Exhale to release slowly and rest with one cheek on the mat.
Common mistakes
- Pulling with bent arms
- Knees splaying wide
- Crunching the back of the neck
Make it easier
- Hold one ankle at a time (half bow)
- Use a strap around the ankles if you cannot reach
- Place a folded blanket under the hip bones
Go further
- Bring the knees and feet closer together while lifting
- Rock gently forward and back on the breath
Skip or modify if: you are pregnant, have recent abdominal surgery, a hernia, or low-back or knee pain that increases in the pose.
Upward-Facing Dog
Urdhva Mukha Svanasana OORD-vuh MOO-kuh shvah-NAHS-uh-nuh
- Meaning
- Upward-facing dog pose
- Level
- Intermediate
- Hold
- 1–5 breaths
- Works
- Arms, wrists, back extensors, chest, hip flexors
Upward-Facing Dog is a strong backbend on straight arms with the thighs lifted off the floor, so only the hands and tops of the feet touch the mat. It appears in Sun Salutation A in many vinyasa classes. Compared with Cobra, it needs more arm strength and more active legs.
How to do it
- Lie on your front with the tops of the feet down, hip-width apart, and the hands beside the lower ribs.
- Press firmly through the hands and straighten the arms as you lift the chest forward and up.
- Press the tops of the feet down so the knees and thighs lift off the floor.
- Stack the shoulders over the wrists, with the elbow creases turned slightly forward.
- Draw the shoulders back and down and lift the breastbone.
- Keep the legs active and the lower back long. Gaze forward or slightly up without dropping the head back.
- Exhale to lift the hips back into Downward-Facing Dog or lower down.
Common mistakes
- Shoulders hunched up by the ears
- Thighs resting on the floor with the weight dumped into the lower back
- Hyperextended, locked elbows
Make it easier
- Practice Cobra in its place
- Place a block under each hand to reduce the angle
Go further
- Hold for 5 steady breaths with thighs fully lifted
- Roll over the toes smoothly from Chaturanga into the pose
Skip or modify if: you have wrist or shoulder injuries, low-back pain that worsens with extension, or are pregnant. Cobra is a gentler alternative.
Wheel Pose
Urdhva Dhanurasana OORD-vuh dah-noo-RAHS-uh-nuh
- Meaning
- Upward bow pose
- Level
- Advanced
- Hold
- 3–5 breaths, 1–3 rounds
- Works
- Arms, shoulders, wrists, back, glutes, legs, hip flexors
Wheel is a full backbend from lying on the back, pressing up onto hands and feet. It demands strength in the arms and legs and openness in the shoulders, chest and hip flexors. Tight shoulders are the most common limit, so prepare them well and treat Bridge as the foundation.
How to do it
- Lie on your back with knees bent and feet flat, hip-width apart and parallel, heels close to the buttocks.
- Place your hands by your ears, fingers pointing toward your shoulders, elbows pointing up and in.
- Press into the feet and lift the hips into Bridge.
- Press into the hands and come onto the crown of the head. Pause, and draw the elbows in so they stay shoulder-width.
- Press both hands and feet down evenly and straighten the arms to lift the head off the floor.
- Keep the knees and feet parallel. Lengthen the tailbone toward the knees and let the chest move toward the wall behind you.
- To come down, tuck the chin, bend the arms and lower the back of the head, then the spine, slowly.
Common mistakes
- Elbows and knees splaying wide
- Feet turning out
- Putting weight on the head for long or rolling onto the neck
Make it easier
- Stay at the "head down" stage, bearing little weight on the head
- Place blocks against a wall under the hands
- Practice Bridge and shoulder openers until the arms can straighten
Go further
- Walk the hands and feet slightly closer together
- Straighten the legs gradually while keeping the chest open
Skip or modify if: you have wrist, shoulder, neck or low-back injuries, uncontrolled high blood pressure, are pregnant, or have not yet built a steady Bridge. Learning it with a teacher is worthwhile.
Sequencing backbends and counterposes
Order backbends from gentle to deep. Start with prone poses that build strength (Sphinx, Cobra, Locust), move to Bridge and the more open shapes (Camel, Bow), and add Wheel only when the body is warm. After backbending, return the spine to neutral before folding deeply. A gentle twist, a knees-to-chest pose or Child's Pose works well. Many teachers avoid going straight from a deep backbend into a strong forward fold, because a sudden reversal can feel jarring for the lower back.
Counterposes
- Child's Pose after prone backbends such as Locust and Bow.
- Knees to chest or a gentle Reclining Twist after Bridge and Wheel.
- Downward-Facing Dog after Upward-Facing Dog, as in the Sun Salutation.
- Sitting on the heels for a few breaths after Camel, to let the circulation settle before standing.
A 20-minute backbend practice
- 3 minCat and cowMove slowly with the breath to warm the whole spine.
- 2 minLow lungeOne minute each side, hips moving forward, to open the hip flexors.
- 2 minSphinx PoseSettle into the upper back and breathe.
- 2 minCobra PoseThree low rounds, resting between each.
- 2 minLocust PoseTwo or three rounds of 3–5 breaths.
- 1 minChild's PoseCounterpose for the prone work.
- 3 minBridge PoseThree rounds, rolling down slowly each time.
- 2 minCamel PoseHands on the pelvis or blocks; sit on the heels afterward.
- 1 minKnees to chestRock gently side to side.
- 2 minReclining TwistOne minute each side to neutralize the spine.
Finish with a few minutes in Corpse Pose. As your practice matures, you can add Bow or Wheel after Bridge.
Related pages
 PosesInversionsFrom Downward Dog to headstand, with clear safety guidance.
 PosesRestorative PosesSupported shapes to rest in after an active practice.
 Body & HealthAnatomy & AlignmentHow the spine, hips and shoulders move in practice.
 Body & HealthPracticing SafelyInjuries, health conditions and when to modify.