In short
- A space the length of a mat and a little wider is enough. A quiet corner beats a perfect room.
- Short, regular sessions build more than occasional long ones. Ten minutes most days is a strong habit.
- Structure every session as warm-up, main practice and cool-down, always ending with rest.
- Three ready-made routines below: 10-minute morning, 20-minute evening wind-down and 45-minute full practice.
Setting up your space
You need a clear area about the size of a yoga mat (roughly 180 by 60 cm, or 6 by 2 feet) with a little extra room on each side for your arms. Stand in the middle and swing your arms out wide and overhead. If you touch nothing, the space works.
- Floor: a firm, level surface is best. Wood, laminate or tile under a mat gives good stability. Thick carpet makes balance poses wobbly; a mat on top helps, or place a board or thin rug underneath.
- A wall: useful for balance support and for poses like Legs-Up-the-Wall. Clear a stretch of wall if you can.
- Temperature: comfortably warm. Cold muscles feel stiff, and you will cool quickly during rest. Keep a blanket nearby.
- Light and quiet: natural light is pleasant; dim light suits evening practice. Close the door, silence notifications, and let others at home know you need a few minutes.
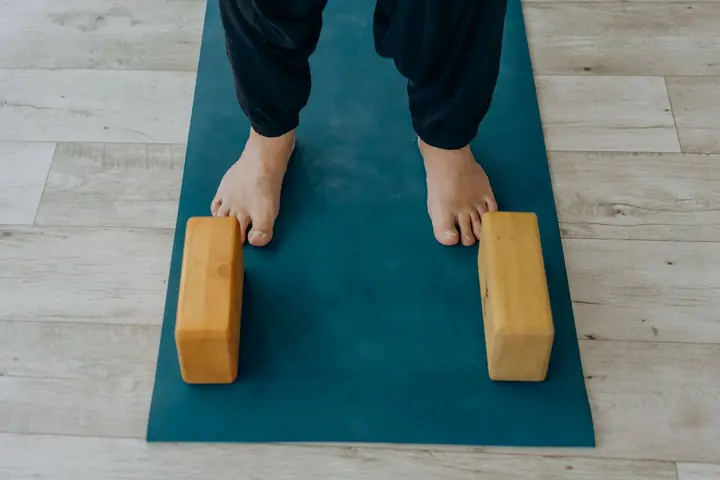
- Props within reach: a mat, two blocks (or thick books), a strap (or a belt), and a blanket or two cover almost everything. See Mats & Props.
If possible, leave your mat out or keep it somewhere visible. Removing small obstacles, such as having to find the mat and move furniture, makes a surprising difference to whether you practice.
Consistency over length
The body adapts to what it does often. Strength, balance and range of motion respond to regular repetition, and the calming effects of breath and rest are easier to reach when they are familiar. For this reason, a short daily or near-daily practice usually does more than a long session once a week.
Start smaller than you think you should. Ten minutes on five days a week is a better first goal than an hour every day, because you are likely to keep it. Anchoring practice to something you already do helps: after brushing your teeth in the morning, or before dinner. On busy days, do a single pose and a minute of breathing. The habit matters more than the content.
Once the short habit is steady, add one or two longer sessions a week. Many experienced practitioners follow this pattern, with a brief daily practice and one or two longer ones, plus occasional classes to refresh technique.
Planning a session
Every session, whatever its length, benefits from the same basic shape. It warms the body before asking more of it, and it brings the nervous system down before you get up and go.
Arrive
Sit or lie down for a minute and notice your breath. This marks the shift from the day to practice and gives you a moment to check how your body feels today.
Warm up
Gentle, repeated movements that mobilize the spine, hips and shoulders: Cat-Cow, Child's Pose, easy Downward Dog, or a few slow rounds of Sun Salutation.
Main practice
The most demanding part. Usually standing poses first, then balances, then backbends or strength work while the body is warm.
Cool down
Seated stretches, forward folds, twists and hip openers. Movements become slower and holds longer.
Rest
End with at least two or three minutes in Corpse Pose, or another restorative pose. Do not skip it, even in a short session.
A useful rule of thumb when you design your own sequences is to balance what you do. Follow a backbend with a gentle forward bend or neutral pose. Do both sides of every one-sided pose. Place more vigorous work in the middle, and quieter work at the start and end.
A 10-minute morning routine
A short, waking practice for the start of the day. It loosens the spine, gets the legs working and ends with a moment of stillness. Move smoothly and keep the breath steady.
- 1 minEasy PoseSit tall on a folded blanket. Take ten slow breaths, lengthening the exhale slightly.
- 1 minCat-CowOn hands and knees. Inhale to lift the chest and tailbone, exhale to round the back. Six to eight rounds.
- 1 minDownward-Facing DogKnees bent, pedal the feet to wake up the calves and hamstrings.
- 2 minSun SalutationTwo or three slow rounds. Step back rather than jump, and lower the knees in the plank if needed.
- 1 minWarrior IIAbout 30 seconds per side. Front knee tracks over the ankle.
- 1 minTriangle PoseAbout 30 seconds per side. Lower hand on the shin or a block.
- 1 minTree PoseAbout 30 seconds per side. Keep the lifted foot off the knee joint.
- 1 minSeated TwistAbout 30 seconds per side. Lengthen on the inhale, turn a little on the exhale.
- 1 minCorpse PoseOr sit quietly. One minute of stillness before you get on with the day.
A 20-minute evening wind-down
A slow, floor-based sequence for the end of the day. Holds are longer and effort is low. Practice at least an hour after a large meal, in dim light if you can. Many people find this kind of practice helps them settle before sleep.
- 2 minEasy PoseSit and breathe with an exhale a little longer than the inhale, for example in for 4, out for 6.
- 1 minCat-CowSlow, small movements. Let the breath lead.
- 2 minChild's PoseKnees wide, forehead on a block or stacked hands. Let the belly soften against the thighs.
- 2 minSphinx PoseForearms down, chest gently lifted. Keep the lower back comfortable and the shoulders soft.
- 2 minSeated Forward FoldSit on a blanket, knees bent as much as needed. Rest the chest toward the thighs without pulling.
- 2 minBound AngleSoles together, knees wide. Support the knees with blocks or cushions if they float high.
- 2 minSupported BridgeA block at low or medium height under the sacrum. Arms relaxed by your sides.
- 2 minReclining TwistOne minute per side. A cushion under the knees if they do not reach the floor.
- 3 minLegs-Up-the-WallHips close to the wall, legs resting up it. A folded blanket under the hips is optional.
- 2 minCorpse PoseCover yourself with a blanket. Let the breath be natural.
A 45-minute full practice
A balanced session covering all the main pose families, suited to someone with a few weeks of experience. Hold standing poses for five to eight breaths per side. If you are short on energy, repeat fewer rounds of the Sun Salutation and spend longer in the cool-down.
- 3 minEasy PoseSettle and breathe. Notice how your body feels today and adjust the session accordingly.
- 2 minCat-CowEight to ten rounds, then circle the hips in both directions.
- 2 minDownward-Facing DogTwo holds of five breaths with a short Child's Pose between.
- 6 minSun SalutationFour to six rounds. Start slow and let the pace settle with the breath.
- 2 minWarrior IEach side. Back heel down, hips turned toward the front as far as is comfortable.
- 4 minWarrior II to Extended Side AngleHold Warrior II, then lower the forearm to the thigh or a hand to a block. Each side.
- 2 minTriangle PoseEach side. Keep both sides of the waist long rather than reaching for the floor.
- 3 minTree PoseEach side. Use a wall if needed. Fix your gaze on a still point.
- 1 minChair PoseTwo holds of five breaths. Weight in the heels, chest lifted.
- 2 minWide-Legged Forward FoldHands on blocks or the floor. Let the head hang. Rise slowly.
- 2 minLocust PoseTwo or three short lifts on the front, resting with one cheek down between.
- 3 minBridge PoseThree rounds of five breaths. Knees stay hip-width, neck relaxed.
- 2 minSeated Forward FoldSit on a blanket, bend the knees as needed, fold from the hips.
- 2 minHead-to-Knee PoseEach side. A strap around the foot if you cannot reach comfortably.
- 2 minSeated TwistEach side. Turn from the ribs; keep the neck easy.
- 1 minHappy BabyHold the feet, shins, or a strap. Rock gently side to side.
- 1 minReclining TwistThirty seconds per side.
- 5 minCorpse PoseFull rest. Blanket over you, a roll under the knees if the lower back is tender.
Videos, apps or self-guided practice
Recorded classes and apps are a practical way to practice at home, particularly early on when you do not yet know what to do next. Self-guided practice, where you choose the poses and pace yourself, develops a different skill: listening to your own body. Most people benefit from both.
Videos and apps
- Provide structure and new ideas.
- Help you learn names and sequencing.
- Make it easy to start when motivation is low.
- Cannot see you or correct your alignment.
- May move faster or push harder than suits you.
Self-guided practice
- Lets you move at your own pace and spend time where you need it.
- Builds body awareness and independence.
- Easy to adapt to energy, injuries and time.
- Requires some knowledge of safe sequencing.
- Easy to repeat favorites and avoid what you need.
When choosing videos, look for teachers who explain the poses clearly, offer variations, and name their qualifications and experience. Start with beginner or gentle classes regardless of your fitness. Pause the video whenever you need to. A mix works well: a class or video once or twice a week to learn, and short self-guided sessions in between to practice what you learned. Taking an occasional in-person class, or a private session, helps catch habits no video can see.
Tracking your practice
A simple record makes progress visible and keeps you honest about consistency. It does not need to be elaborate.
- What to note: date, length, what you did (the routine name is enough), and one sentence about how you felt before and after.
- Where: a paper notebook by the mat, a calendar with a tick for each session, or a note on your phone.
- What to look for: over weeks, notice patterns. Perhaps morning sessions stick better than evening ones, or balance poses feel steadier after a run of daily practice.
Measure the things that matter to you. Some people track how far they fold forward; others track sleep or how they feel after a stressful day. Avoid turning the record into a score to beat. Some days a short, gentle session is exactly right.
Staying safe on your own
Practicing at home is generally safe, but without a teacher watching, it is up to you to notice warning signs. A few principles cover most situations.
- Always warm up before deeper stretches, backbends or strength work.
- Stay with poses you have learned from a teacher or a reliable source. Save advanced inversions such as Headstand and Shoulder Stand for supervised practice until you are confident.
- Work at a level where you can breathe smoothly. Holding the breath or straining is a sign to ease off.
- Stop if you feel sharp pain, pain in a joint, numbness, tingling, dizziness or chest discomfort.
- Use a wall or chair for balance poses so a wobble does not become a fall. Clear sharp furniture corners from the area.
- Practice on a non-slip surface. Socks on a smooth floor are a common cause of slips.
- Get up slowly after lying down, especially after long rests or inversions, to avoid lightheadedness.