In short
- Balance poses strengthen the small stabilizing muscles of the feet, ankles and hips, and ask for steady focus.
- Wobbling is part of the practice. Small corrections are how balance improves.
- A fixed gaze point (drishti), a strong standing foot and a quiet breath help more than effort.
- Use a wall, a chair or blocks freely. Falling out of a pose safely matters more than staying in it.
Before you start
Balance is easier on warm, awake legs. Practice these poses after a few Sun Salutations and some standing poses, and before you are tired. Clear the space around you, practice barefoot on a mat that does not slide, and keep a wall or sturdy chair within arm's reach.
Alignment principles for this family
- Build the standing foot first. Spread the toes and press evenly through the big-toe mound, little-toe mound and heel. Most wobbles start with weight rolling to the outer edge of the foot.
- Keep the standing knee soft. A microbend lets the muscles, rather than the locked joint, hold you up.
- Fix the gaze. Choose a point that does not move, on the floor a couple of meters ahead or on the wall. Traditional practice calls this drishti. Looking around is the quickest way to fall.
- Engage the center. Draw the lower belly gently in and keep the pelvis level, or level for that pose. The core links the standing leg to the rest of the body.
- Breathe slowly and evenly. Holding the breath makes the body rigid and less able to adjust.
- Enter in stages. Each pose below has a first stage that is complete in itself. Stay there until it is steady before going further.
Tree Pose
Vrksasana vrik-SHAHS-uh-nuh
- Meaning
- Tree pose (vrksa, tree)
- Level
- Beginner
- Hold
- 5–10 breaths per side
- Works
- Feet, ankles, standing leg, hips, focus
Tree Pose is the classic first balance, standing on one leg with the other foot pressed against the inner standing leg. It strengthens the ankle and hip of the standing leg and opens the hip of the lifted leg. It is a good daily check of how steady you feel.
How to do it
- Stand in Mountain Pose and shift your weight into the left foot.
- Turn the right knee out and place the right foot on the inner left ankle, calf or upper thigh. Avoid pressing on the knee joint.
- Press the foot and the standing leg into each other with equal force.
- Keep the pelvis level and facing forward as the right knee opens to the side.
- Bring the palms together at the chest, or reach the arms overhead.
- Fix your gaze on a point that does not move.
- Breathe steadily, then lower the foot and repeat on the other side.
Common mistakes
- Placing the foot against the side of the knee.
- Hip of the standing leg jutting out to the side.
- Locking the standing knee.
Make it easier
- Keep the toes of the lifted foot on the floor, heel on the inner ankle (kickstand).
- Stand with one hand on a wall.
Go further
- Reach the arms overhead and spread them like branches.
- Close the eyes for a few breaths.
- Place the foot in half lotus on the top of the thigh, if the knee is fully comfortable.
Skip or modify if: you have an ankle injury, low blood pressure or vertigo; keep a hand on the wall and the lifted foot low.
Eagle Pose
Garudasana gah-roo-DAHS-uh-nuh
- Meaning
- Pose of Garuda, the eagle-like mount of the god Vishnu in Hindu myth
- Level
- Intermediate
- Hold
- 5–8 breaths per side
- Works
- Standing leg, outer hips, upper back, shoulders
Eagle Pose wraps one leg around the other and one arm around the other while sitting low on a bent standing knee. The wrapping stretches the outer hips and the space between the shoulder blades. The small base makes balance a real test, so it helps to learn the arms and legs separately.
How to do it
- Stand in Mountain Pose and bend both knees slightly, as in Chair Pose.
- Shift your weight into the left foot and cross the right thigh over the left.
- Hook the right foot behind the left calf, or rest the right toes on the floor or a block beside the left foot.
- Extend the arms forward, cross the left arm over the right at the elbows and bend the elbows.
- Bring the palms together, or press the backs of the hands together, or hold opposite shoulders.
- Lift the elbows to shoulder height and move the forearms away from the face.
- Sink the hips a little lower, keep the chest lifted and breathe. Unwind and repeat on the other side.
Common mistakes
- Standing leg too straight, which makes the wrap and balance harder.
- Shoulders shrugging up while the elbows drop.
- Forcing the foot hook and twisting the knee.
Make it easier
- Rest the toes of the crossed leg on the floor or a block.
- Hold opposite shoulders instead of wrapping the forearms.
- Stand with the back against a wall.
Go further
- Sink lower on the standing leg.
- Fold forward, bringing the elbows toward the top knee.
Skip or modify if: you have knee, ankle or shoulder injuries; do the arm position seated, or keep the toes of the crossed leg down.
Warrior III
Virabhadrasana III veer-uh-buh-DRAHS-uh-nuh
- Meaning
- Pose of the warrior Virabhadra, third form
- Level
- Intermediate
- Hold
- 3–8 breaths per side
- Works
- Hamstrings, glutes, back muscles, core, standing ankle
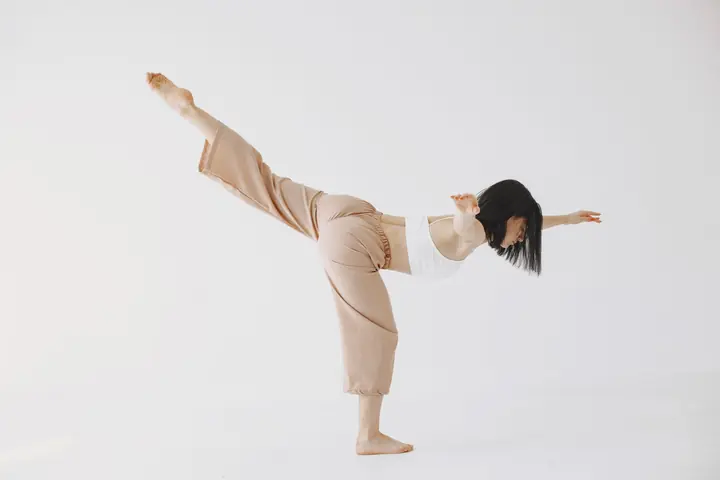
In Warrior III the body tips forward on one leg until the torso and lifted leg form a line roughly parallel to the floor. It strongly works the back of the standing leg, the glutes and the back muscles. The challenge is keeping the hips level while the body hinges.
How to do it
- Stand in Mountain Pose with the hands on the hips, and shift your weight into the left foot.
- Keep a microbend in the left knee.
- Hinge forward from the left hip as the right leg lifts behind you, moving as one unit like a seesaw.
- Point the right toes toward the floor so the hips stay level, and reach back through the right heel.
- Stop when the torso and right leg are parallel to the floor, or earlier.
- Keep the neck long, gaze down at the floor a little ahead.
- Reach the arms forward, back along the sides, or keep them on the hips. Return to standing with control and repeat on the other side.
Common mistakes
- The lifted hip rolling up and the leg turning out.
- Locking the standing knee.
- Lifting the head and compressing the back of the neck.
Make it easier
- Place the hands on blocks under the shoulders or on a chair seat.
- Press the lifted foot into a wall behind you at hip height.
- Keep the lifted toes on the floor as a first stage.
Go further
- Reach the arms forward alongside the ears.
- Move from Warrior I into Warrior III without a pause.
Skip or modify if: you have a hamstring or ankle injury, lower-back pain or high blood pressure; use a chair for the hands and keep the arms low.
Half Moon Pose
Ardha Chandrasana AR-duh chun-DRAHS-uh-nuh
- Meaning
- Half moon pose (ardha, half; chandra, moon)
- Level
- Intermediate
- Hold
- 3–8 breaths per side
- Works
- Standing leg, outer hip, core, side body
Half Moon balances on one foot and one hand with the body open to the side and the top leg lifted in line with the torso. It builds strength in the outer hip of the standing leg and asks for coordination through the whole body. Most teachers treat a block under the hand as standard.
How to do it
- Start in Triangle Pose with the right leg forward, a block in reach by the right foot.
- Bend the right knee and place the right hand on the block about 30 cm (a foot) in front of and slightly outside the right foot.
- Shift your weight into the right foot and lift the left leg as you straighten the right leg.
- Raise the left leg to hip height, foot flexed, toes pointing forward.
- Stack the left hip over the right and open the chest to the side.
- Reach the left arm up in line with the shoulders, or rest the hand on the hip.
- Look down, forward or up as balance allows. Return by bending the standing knee and lowering the back foot. Repeat on the other side.
Common mistakes
- Lower hand placed right beside the foot, which crowds the pose.
- Lifted leg drifting forward or dropping below hip height.
- Leaning heavily into the lower hand.
Make it easier
- Use a block at its highest height.
- Practice with the back against a wall.
- Keep the top hand on the hip and the gaze down.
Go further
- Lift the lower hand off the block for a few breaths.
- Try Sugarcane Pose, bending the top knee and holding the foot behind you.
Skip or modify if: you have low blood pressure, a neck injury or an unstable ankle; practice against a wall with the gaze down.
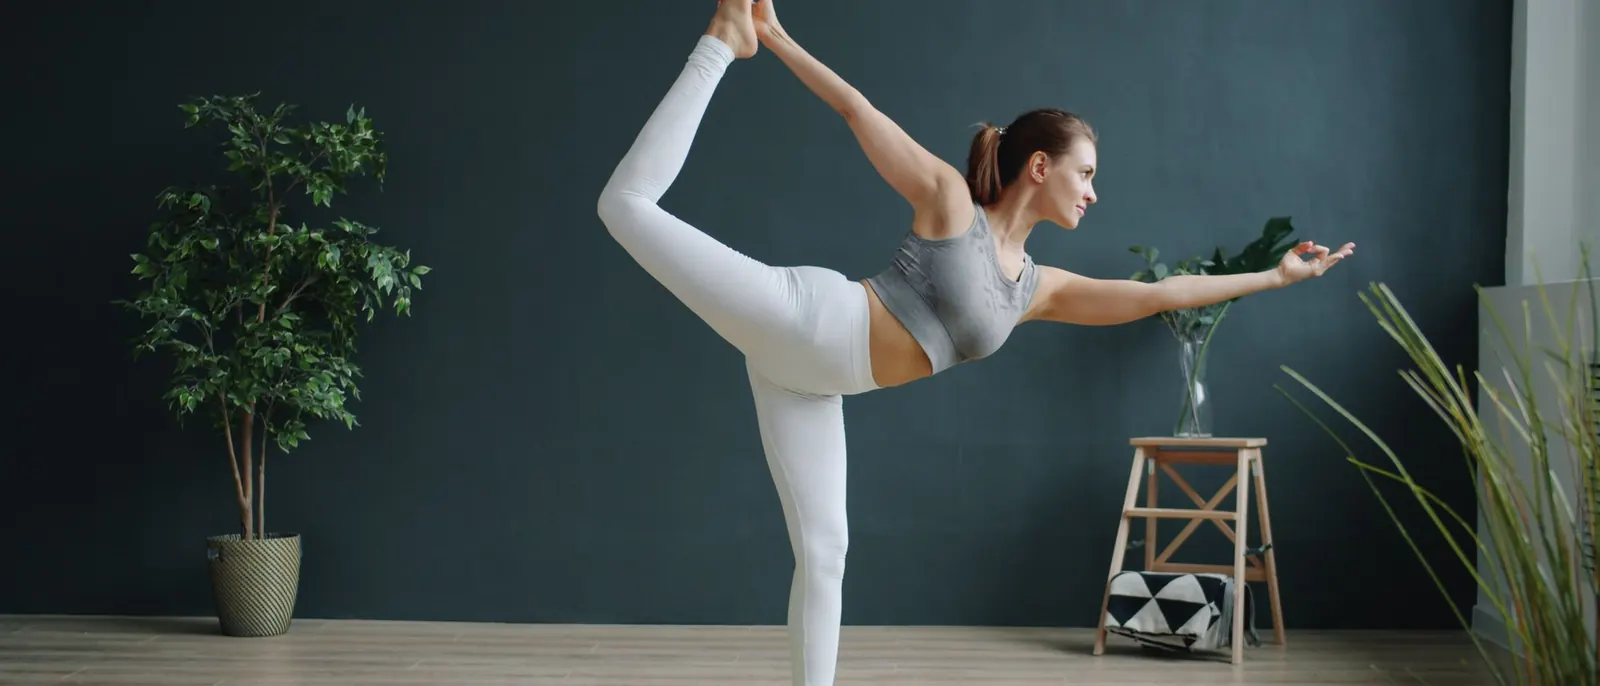
Dancer Pose
Natarajasana not-uh-rah-JAHS-uh-nuh
- Meaning
- Lord of the dance pose, after Nataraja, the dancing form of Shiva
- Level
- Intermediate
- Hold
- 3–8 breaths per side
- Works
- Standing leg, quadriceps and hip flexors, chest, shoulders, back
Dancer Pose balances on one leg while holding the other foot behind you and tipping forward into a standing backbend. It combines balance, a quadriceps and hip-flexor stretch and a chest opener. The version below is the common intermediate form. The full classical pose, with both hands holding the foot overhead, is advanced.
How to do it
- Stand in Mountain Pose and shift your weight into the left foot.
- Bend the right knee and hold the inside of the right foot or ankle with the right hand.
- Bring the knees together briefly and lengthen the spine.
- Reach the left arm forward and up.
- Press the right foot back into the hand so the leg lifts behind you, and let the torso tip forward as a counterbalance.
- Keep the hips roughly level and the right knee pointing back rather than out to the side.
- Keep the standing leg strong and the gaze fixed ahead. Lower slowly and repeat on the other side.
Common mistakes
- Pulling the foot with the arm instead of kicking it into the hand.
- The lifted knee swinging out to the side.
- Crunching into the lower back instead of lifting the chest.
Make it easier
- Hold a strap looped around the foot.
- Rest the front hand on a wall.
- Keep the torso upright and the lift small.
Go further
- Kick the foot higher while keeping the hips level.
- Turn the hand to grip the foot from overhead, then take both hands to the foot.
Skip or modify if: you have lower-back pain, a knee injury or shoulder problems; hold a strap, use a wall and keep the backbend small.
Crow Pose
Bakasana bah-KAHS-uh-nuh
- Meaning
- Crane pose (baka, crane). Commonly called Crow Pose; some teachers reserve "crow" (kakasana) for a bent-arm version
- Level
- Intermediate
- Hold
- 3–5 breaths
- Works
- Wrists, forearms, shoulders, core, hip flexors
Crow Pose is usually the first arm balance people learn. The knees rest high on the backs of the upper arms while the feet lift off the floor. It depends more on technique and leaning forward far enough than on raw strength, and a pillow in front of the face makes it much less intimidating.
How to do it
- Squat with the feet close together and the knees wide, and place a cushion or folded blanket in front of you.
- Plant the hands shoulder-width apart on the floor, fingers spread, about 30 cm (a foot) in front of the feet.
- Bend the elbows back and place the knees on the backs of the upper arms, as high toward the armpits as possible.
- Come onto the balls of the feet and round the upper back, drawing the belly in.
- Look forward at the floor ahead of the hands, not between them.
- Shift the weight forward into the hands until one foot, then the other, lifts.
- Squeeze the knees into the arms and the heels toward the buttocks. Lower the feet with control to exit.
Common mistakes
- Looking down between the hands, which tips the body backward.
- Elbows splaying out to the sides.
- Jumping up instead of shifting weight gradually.
Make it easier
- Stand the feet on a block to start higher.
- Lift one foot at a time and keep the toes of the other down.
Go further
- Straighten the arms toward full crane.
- Try Side Crow (Parsva Bakasana), twisting to place both knees on one arm.
Skip or modify if: you have wrist, elbow or shoulder injuries, carpal tunnel syndrome or are pregnant; practice the squat and hand position without lifting the feet.
Side Plank
Vasisthasana vah-sish-TAHS-uh-nuh
- Meaning
- Pose dedicated to the sage Vasistha
- Level
- Intermediate
- Hold
- 3–8 breaths per side
- Works
- Shoulders, wrists, obliques, outer hips
Side Plank balances on one hand and the outer edge of one foot, with the body in a straight line facing sideways. It builds shoulder stability and strength along the side of the trunk and hips. The knee-down version is a complete pose in itself and a sensible starting point.
How to do it
- Start in a high plank with the hands under the shoulders.
- Shift slightly to the right hand and roll onto the outer edge of the right foot.
- Stack the left foot on the right, or place the left foot on the floor in front of the right for more support.
- Place the right hand slightly ahead of the shoulder and press the floor away, fingers spread.
- Lift the hips so the body forms one line from head to heels.
- Reach the left arm up in line with the right, or rest it on the hip.
- Look forward or up at the top hand. Lower with control and repeat on the other side.
Common mistakes
- Hips sagging toward the floor.
- Sinking into the supporting shoulder.
- Hand placed directly under or behind the shoulder, loading the wrist.
Make it easier
- Lower the bottom knee to the floor, shin angled back.
- Stagger the feet.
- Practice on the forearm instead of the hand.
Go further
- Lift the top leg.
- Hold the big toe of the top leg and extend the leg upward, the full classical form.
Skip or modify if: you have wrist, elbow or shoulder injuries; practice on the forearm with the bottom knee down.
Sequencing balance poses
Place balance poses in the middle of a practice, once the legs are warm and before long holds or deep backbends have tired you. Standing balances flow naturally from the standing poses they resemble. Tree follows Mountain Pose, Warrior III follows Warrior I, and Half Moon follows Triangle. Arm balances such as Crow and Side Plank come after the wrists and shoulders have warmed up in Sun Salutations and plank work. Afterward, rest the wrists and let the breath settle in a forward fold or Child's Pose.
This mini-sequence takes about 12 minutes after a warm-up. Practice the standing balances fully on one side, then the other.
- 1 minMountain PoseEyes on a fixed point, weight even.
- 2 minTree Pose5–8 breaths each side.
- 2 minEagle Pose5 breaths each side, then stand and shake out the legs.
- 2 minWarrior IIIFrom Warrior I, hands on blocks if needed.
- 2 minHalf Moon PoseFrom Triangle, block under the hand.
- 1 minDancer Pose3–5 breaths each side, strap or wall if needed.
- 1 minSide PlankKnee down or full, 3–5 breaths each side.
- 1 minCrow PoseTwo or three short attempts, cushion in front.
Finish with a minute in Child's Pose. For more on training balance safely as you age, see Practicing Safely, and for the evidence on yoga and balance, see Benefits of Yoga.
Related pages
 PosesStanding PosesThe foundations that most standing balances grow out of.
 PosesInversionsThe next step in upper-body strength and control after arm balances.
 Breath & MindMeditationSimple methods for training the steady attention that balance relies on.
 PosesPose LibraryEvery pose in the guide, filterable by family and level.