In short
- Restorative poses are held for 3–15 minutes, with props carrying the body's weight.
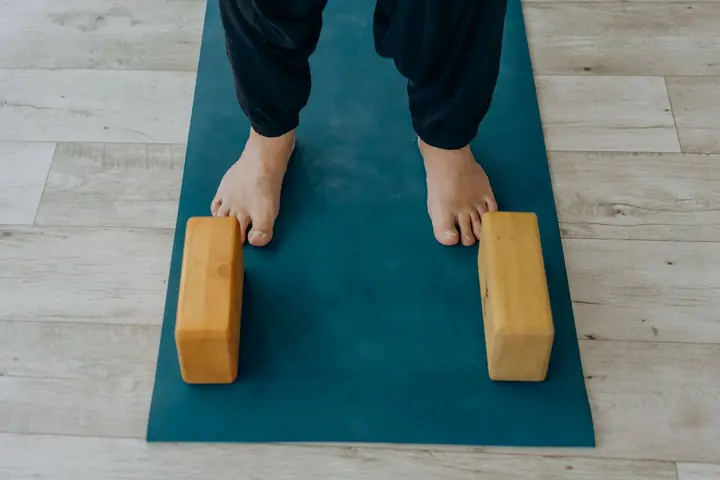
- A bolster, two or three blankets and a couple of blocks cover almost every setup. Firm pillows and folded towels work at home.
- If you feel a strong stretch, add support until the stretch fades. Comfort is the goal.
- Research suggests restorative practice may help with stress and relaxation; it is a complement to medical care, never a replacement for it.
Before you start
Restorative yoga as a distinct practice grew largely out of the prop-based teaching of B.K.S. Iyengar and was popularized by his students, notably Judith Hanson Lasater. Its logic is simple. When the body is fully supported, muscles can stop holding and the breath tends to slow. Poses are few, holds are long, and the room is kept warm and quiet.
Setting up
- Gather props first. Getting up mid-pose to fetch a blanket undoes the settling. Keep a bolster, two or three blankets, two blocks, a strap and an eye pillow or folded cloth nearby. See Mats & Props for what each prop does.
- Stay warm. Body temperature drops when you are still. Wear layers or cover yourself with a blanket, especially in Corpse Pose.
- Support every gap. Wherever a limb hovers or a joint feels strained, fill the space with a blanket or block.
- Use a timer. A gentle alarm lets you stop checking the clock.
Principles
Aim for a sensation of mild opening, or none at all. Stretching is not the point, and a strong stretch held for 10 minutes can leave joints and ligaments sore. Breathe naturally through the nose and let the exhale lengthen on its own. Come out of each pose slowly, usually by rolling to one side. If lying flat on your back is uncomfortable, for example in later pregnancy, raise the upper body on a bolster or lie on your side, and check Practicing Safely.
Child's Pose
Balasana bah-LAHS-uh-nuh
- Meaning
- Child's pose
- Level
- Beginner
- Hold
- 1–5 minutes
- Works
- Lower back, hips, thighs, ankles, rest
Child's Pose is a kneeling forward fold with the forehead down. In an active class it is the place to rest at any time. In its supported form, with the torso draped over a bolster, it becomes a full restorative pose that gently releases the lower back.
Prop setup
A bolster lengthwise between the knees, a folded blanket between the thighs and calves if the knees are tight, and a rolled blanket under the ankles if the tops of the feet ache.
How to do it
- Kneel with the big toes touching and the knees hip-width or wider.
- Place the bolster lengthwise between the knees, its near end against the belly.
- Fold forward and lie your torso along the bolster, chest supported.
- Turn your head to one side, cheek on the bolster, and let the arms rest on the floor beside it.
- Let the buttocks sink toward the heels. Add a blanket between them if they do not reach.
- Breathe into the back of the ribs.
- Halfway through, turn the head to the other side.
Common mistakes
- Knees too close together, which squeezes the belly and restricts breathing
- Staying with the head turned one way for the whole hold
- Forcing the hips to the heels
Make it easier
- Raise the bolster on two blocks so the torso is higher
- Place a rolled blanket behind the knees
Go further
- Remove the bolster and rest the forehead on the floor or a block
- Walk the hands to one side for a gentle side stretch
Skip or modify if: you have knee injuries (add height under the hips or try another pose), are pregnant (keep the knees wide and the bolster high), or have ankle pain.
Supported Bridge
Salamba Setu Bandha Sarvangasana sah-LAHM-buh SAY-too BAHN-duh sar-vahn-GAHS-uh-nuh
- Meaning
- Supported bridge-building all-limbs pose
- Level
- Beginner
- Hold
- 3–5 minutes
- Works
- Hip flexors, chest, lower back release
Supported Bridge rests the pelvis on a block so the hips are lifted without any muscular effort. It gently opens the front of the hips and chest and is a mild inversion. It is the passive counterpart of the active Bridge Pose.
Prop setup
One block, at its lowest or middle height, under the sacrum (the flat bone at the base of the spine). Optionally a folded blanket under the head.
How to do it
- Lie on your back with the knees bent, feet flat and hip-width apart.
- Lift the hips and slide the block under the sacrum, not the lower back.
- Lower the pelvis onto the block and check it feels stable and comfortable.
- Rest the arms on the floor alongside the body or out to the sides, palms up.
- Keep the knees bent, or straighten the legs one at a time for more hip opening.
- Let the shoulders and head rest heavily on the floor.
- To come out, bend the knees, press into the feet, lift the hips, remove the block and lower down slowly.
Common mistakes
- Placing the block under the lumbar spine, which arches the lower back
- Using the tallest height and feeling a pinch in the back
- Lifting out quickly
Make it easier
- Use the block at its lowest height, or a firm folded blanket
- Keep the knees bent and let them lean together
Go further
- Straighten both legs along the floor
- Try the block at its middle height
Skip or modify if: you have lower-back pain that increases with extension (lower the block), a neck injury, or are in later pregnancy and uncomfortable on your back.
Reclined Bound Angle
Supta Baddha Konasana SOOP-tuh BAH-duh koh-NAHS-uh-nuh
- Meaning
- Reclined bound angle pose
- Level
- Beginner
- Hold
- 5–10 minutes
- Works
- Inner thighs, hips, chest, relaxation
Reclined Bound Angle lies you back over a bolster with the soles of the feet together and the knees supported out to the sides. It opens the hips and chest gently. It is a staple of restorative sequences and one of the most comfortable long holds once propped well.
Prop setup
A bolster lengthwise behind you, optionally raised at the far end on a block. A folded blanket under the head. A block or rolled blanket under each outer thigh. A strap looped around the pelvis and feet is optional.
How to do it
- Sit with the short end of the bolster touching your lower back.
- Bring the soles of the feet together and let the knees open.
- Place a block or rolled blanket under each outer thigh so the knees are supported.
- Lean back onto your forearms, then lower your spine and head onto the bolster.
- Add a folded blanket under the head so the chin is slightly lower than the forehead.
- Rest the arms out to the sides, palms up, with the elbows supported if they hover.
- To come out, press the knees together with the hands, roll to one side and pause before sitting up.
Common mistakes
- Leaving the knees unsupported and straining the inner thighs or groin
- Head tipped back with the chin higher than the forehead
- Feet too close to the pelvis for your hips
Make it easier
- Move the feet further away from the body
- Raise the thigh supports higher
- Raise the bolster's head end on a block
Go further
- Lower the thigh supports gradually
- Loop a strap around the pelvis and feet to hold the shape
Skip or modify if: you have groin or knee injuries (support the thighs generously), lower-back discomfort (raise the bolster or bend less), or are in later pregnancy (raise the upper body higher).
Supported Fish
Salamba Matsyasana sah-LAHM-buh maht-see-AHS-uh-nuh
- Meaning
- Supported fish pose
- Level
- Beginner
- Hold
- 3–5 minutes
- Works
- Chest, front of shoulders, upper back
Supported Fish is a gentle chest opener that rests the upper back over blocks or a bolster. It counters the rounded posture of sitting at a desk. It is also a common follow-up to shoulder stand because it takes the neck in the opposite direction, but keep the head supported in this restorative version.
Prop setup
Two blocks: one on its middle height under the shoulder blades, one on its highest or middle height under the head. Alternatively, a bolster crosswise under the shoulder blades with a folded blanket under the head.
How to do it
- Sit with the blocks behind you in a line along the mat.
- Lie back so the first block sits under the lower tips of the shoulder blades.
- Rest the back of the head on the second block. Adjust its height so the neck feels neutral, never hanging.
- Extend the legs, or bend the knees with the feet flat if the lower back feels sensitive.
- Let the arms open to the sides, palms up, in a low "cactus" or wide V.
- Breathe into the upper chest and let the collarbones widen.
- To come out, roll to one side, remove the blocks and rest on your back for a few breaths.
Common mistakes
- Block too low on the back, arching the lumbar spine
- Head unsupported and tipped back
- Tingling in the arms ignored
Make it easier
- Use the blocks at their lowest height, or a rolled blanket under the shoulder blades
- Keep the knees bent
Go further
- Raise the block under the shoulder blades one level
- Reach the arms overhead to the floor
Skip or modify if: you have a neck injury (keep the head higher), shoulder pain when the arms open, or lower-back pain (bend the knees and lower the blocks).
Reclining Twist
Supta Matsyendrasana SOOP-tuh mat-see-en-DRAHS-uh-nuh
- Meaning
- Reclined lord of the fishes pose
- Level
- Beginner
- Hold
- 2–5 minutes per side
- Works
- Spine rotation, outer hips, chest, lower back release
In the Reclining Twist you lie on your back and let the knees fall to one side while the shoulders stay grounded. It is a soft spinal rotation that many people use at the end of a practice or after backbends. The Sanskrit name refers to the sage Matsyendra; the pose is also taught under other names, such as Jathara Parivartanasana variations.
Prop setup
A bolster or folded blankets beside you to support the stacked knees, and a folded blanket under the head. A block between the knees is optional.
How to do it
- Lie on your back with knees bent and feet flat, and place the bolster alongside your right hip.
- Shift your hips a few inches to the left.
- Let both knees lower to the right, stacked, onto the bolster.
- Open the arms out to the sides at shoulder height, palms up, or rest the right hand on the top knee.
- Let the left shoulder rest toward the floor. Support it with a blanket if it lifts.
- Turn the head to the left only if the neck feels comfortable; otherwise keep it centered.
- Bring the knees back through center and repeat on the other side.
Common mistakes
- Letting the knees hang unsupported, which strains the lower back
- Forcing the opposite shoulder down
- Twisting from the neck
Make it easier
- Raise the knee support higher
- Keep the knees at hip height rather than drawn in
Go further
- Draw the knees closer to the chest
- Straighten the top leg and hold the foot with a strap
Skip or modify if: you have a disc injury or sacroiliac joint pain that twisting aggravates, recent abdominal or spinal surgery, or are in later pregnancy (twist gently, knees supported, or lie on your side).
Happy Baby
Ananda Balasana ah-NAHN-duh bah-LAHS-uh-nuh
- Meaning
- Happy child pose
- Level
- Beginner
- Hold
- 1–2 minutes
- Works
- Inner thighs, hips, hamstrings, lower back release
Happy Baby lies you on your back holding the feet with the knees drawn wide toward the armpits. It is more active than the other poses on this page, since you hold the feet, but it releases the hips and lower back comfortably. It fits well near the end of a practice, before a long rest.
Prop setup
A folded blanket under the head. A strap around each foot if you cannot reach them comfortably. For a hands-free version, rest the outer shins against a wall.
How to do it
- Lie on your back and draw the knees toward the chest.
- Open the knees wider than the torso, toward the armpits.
- Stack the ankles over the knees so the shins are vertical and the soles face the ceiling.
- Hold the outer edges of the feet, the ankles or the shins.
- Let the tailbone and sacrum rest toward the floor, keeping the lower back long.
- Keep the head and shoulders on the floor, with the chin level.
- Rock gently side to side if it feels good, then release the feet to the floor.
Common mistakes
- Pulling the feet so hard the tailbone lifts off the floor
- Lifting the head and shoulders to reach the feet
- Clenching the jaw or shoulders
Make it easier
- Hold the backs of the thighs or shins instead
- Use a strap around each foot
- Practice one leg at a time
Go further
- Draw the knees closer to the floor beside the ribs
- Hold the big toes with the first two fingers
Skip or modify if: you have knee or hip injuries that dislike deep flexion, a neck injury (keep a blanket under the head), or are in later pregnancy.
Corpse Pose
Savasana shah-VAHS-uh-nuh
- Meaning
- Corpse pose
- Level
- Beginner
- Hold
- 5–15 minutes
- Works
- Whole-body relaxation, breath awareness
Corpse Pose is lying still on your back at the end of a practice. It looks like the easiest pose, yet many teachers consider it one of the hardest, because staying still and awake without fidgeting takes practice. The Hatha Yoga Pradipika describes it as a pose that removes fatigue and brings rest to the mind.
Prop setup
A bolster or rolled blanket under the knees, a folded blanket under the head, a blanket over the body for warmth, and an eye pillow or folded cloth over the eyes.
How to do it
- Sit with the bolster in front of you, then lie back with the bolster under the knees.
- Place a thin folded blanket under the head so the forehead is slightly higher than the chin.
- Let the legs fall open naturally and the feet roll out.
- Rest the arms a little away from the body, palms up.
- Draw the shoulder blades gently under you, then let them settle.
- Close the eyes and let the breath be natural. Scan the body from feet to head and let each area soften.
- To come out, deepen the breath, move the fingers and toes, roll to the right side and rest before sitting up.
Common mistakes
- Skipping it to save time
- Getting cold, which makes it hard to settle
- Sitting up suddenly at the end
Make it easier
- Lie with the calves on a chair seat if the lower back aches
- Rest on your side with a pillow between the knees
- Use a guided body scan from the Meditation page
Go further
- Remove props gradually as the body relaxes more easily
- Rest for a full 15 minutes after a strong practice
Skip or modify if: you are in later pregnancy (lie on your left side or raise the upper body), have lower-back discomfort (support the knees), or find lying still distressing (keep the eyes open and focus on the breath).
Building a restorative sequence
A restorative session usually includes four to six poses and runs 30–60 minutes. Move from gentle opening poses toward the quietest ones, and always finish with Corpse Pose. Aim for balance: a mild backbend (Supported Fish or Supported Bridge), a forward fold (Child's Pose), a twist, and a long final rest. Restorative poses also make a good close to any active practice, such as after backbends or inversions, or on their own in the evening.
A 40-minute restorative practice
- 4 minChild's PoseOver a bolster, turning the head halfway through.
- 4 minSupported FishBlocks under the shoulder blades and head.
- 5 minSupported BridgeBlock under the sacrum, legs straight or bent.
- 8 minReclined Bound AngleBolster behind, blocks under the thighs.
- 6 minReclining TwistThree minutes each side, knees on a bolster.
- 1 minHappy BabyRock gently to release the lower back.
- 12 minCorpse PoseBolster under the knees, blanket over the body, eyes covered.
If time is short, a single pose done well is worthwhile. Ten minutes of Legs-Up-the-Wall or Reclined Bound Angle before bed is a simple place to start. Pairing the holds with slow breathing from the Breathwork page can deepen the rest.