In short
- Standing poses strengthen the legs and hips, train balance and teach the alignment habits used in every other family of poses.
- Most are suitable for beginners, and all can be adapted with a block, a wall or a shorter stance.
- Work from the feet up. A stable, even base makes the rest of each pose easier to organize.
- Practice both sides, hold for a few steady breaths and keep the knees in line with the toes.
Before you start
Warm up for five minutes first. A few rounds of the Sun Salutation, gentle hip circles, and bending and straightening the knees while swinging the arms are all enough to raise body temperature and wake up the legs. Practice on a non-slip mat with bare feet so the toes can spread and grip.
Alignment principles for this family
- Root through the feet. Feel the base of the big toe, the base of the little toe and the center of the heel pressing down. Lifting and spreading the toes, then setting them down, is a useful way to find this.
- Track the front knee over the toes. In lunging poses the knee should point in the same direction as the second or third toe and stay roughly above the ankle. Letting it collapse inward is the most common source of knee strain.
- Know which hip position you are in. Some poses are "hips open" (pelvis facing the long edge of the mat, as in Warrior II and Triangle). Others are "hips square" (pelvis facing the front, as in Warrior I and Pyramid). Most confusion in these poses comes from mixing the two.
- Length before depth. Keep the spine long and the breath easy. A shorter stance or a block under the hand usually gives a better pose than reaching for the floor.
- Heel-to-heel or heel-to-arch. Hips-open poses traditionally line up the front heel with the back heel or arch. For more stability, widen the feet sideways as if standing on two train tracks. This helps square-hip poses especially.
For more on how these joints move, see Anatomy & Alignment.
Mountain Pose
Tadasana tah-DAHS-uh-nuh
- Meaning
- Mountain pose (tada, mountain)
- Level
- Beginner
- Hold
- 5–10 breaths
- Works
- Posture, feet, legs, core awareness
Mountain Pose is simply standing, done with attention. It is the starting and finishing point of the Sun Salutation and the template for the head, ribs and pelvis in every standing pose. It looks easy, and it rewards careful practice because it shows your habitual way of standing.
How to do it
- Stand with the feet together or hip-width apart, outer edges of the feet roughly parallel.
- Spread the toes and press evenly through the big-toe mound, little-toe mound and heel.
- Firm the thighs gently, without locking the knees back.
- Let the tailbone point down and keep the pelvis neutral, neither tipped forward nor tucked.
- Stack the ribs over the pelvis and soften the front lower ribs.
- Let the arms hang with the palms facing the thighs or forward. Widen across the collarbones.
- Lengthen up through the crown of the head, chin level, gaze soft and forward.
Common mistakes
- Hyperextending (locking) the knees.
- Weight drifting into the heels or the outer edges of the feet.
- Thrusting the chest forward and arching the lower back.
Make it easier
- Stand with the feet hip-width apart for a wider base.
- Stand with the back of the body lightly touching a wall to feel where you are.
Go further
- Close the eyes for a few breaths to challenge balance.
- Squeeze a block between the thighs to feel the inner legs engage.
Skip or modify if: you feel dizzy or have low blood pressure; stand with feet apart, keep the eyes open and stand near a wall.
Warrior I
Virabhadrasana I veer-uh-buh-DRAHS-uh-nuh
- Meaning
- Pose of Virabhadra, a fierce warrior form of Shiva in Hindu myth
- Level
- Beginner
- Hold
- 5–8 breaths per side
- Works
- Quadriceps, glutes, hip flexors of the back leg, shoulders
Warrior I is a lunge with the hips facing forward and the arms raised. It strengthens the front leg while stretching the hip flexors and calf of the back leg. It is also part of Sun Salutation B.
How to do it
- From Mountain Pose, step the left foot back about a leg's length.
- Turn the back foot out 30–45 degrees and press the outer edge of the back heel down.
- Set the feet hip-width apart side to side, so they are on two separate tracks.
- Bend the front knee toward a right angle, knee above the ankle and pointing over the toes.
- Draw the right hip back and the left hip forward so the pelvis faces the front as much as comfortable.
- Lift the arms overhead, shoulder-width apart, and let the shoulder blades move up with the arms without squeezing the neck.
- Keep the lower ribs drawn in rather than arching the lower back. Repeat on the other side.
Common mistakes
- Feet on one line (heel to heel), which twists the pelvis and strains the back knee.
- Front knee drifting inward or past the ankle.
- Arching the lower back to "square" the hips.
Make it easier
- Shorten the stance and widen the feet.
- Lift the back heel into a high lunge instead.
- Keep the hands on the hips.
Go further
- Bend the front knee deeper while keeping the back leg straight and strong.
- Bring the palms together overhead and lift the gaze toward the thumbs if the neck allows.
Skip or modify if: you have a knee, hip or lower-back injury, or shoulder problems; keep the hands on the hips and use a shorter stance.
Warrior II
Virabhadrasana II veer-uh-buh-DRAHS-uh-nuh
- Meaning
- Pose of the warrior Virabhadra, second form
- Level
- Beginner
- Hold
- 5–8 breaths per side
- Works
- Legs, hips, inner thighs, shoulders, stamina
Warrior II is a wide lunge with the hips open to the side and the arms stretched out at shoulder height. It builds leg strength and endurance and opens the inner thighs. It also forms the base for Triangle and Extended Side Angle.
How to do it
- Stand with the feet about 1 to 1.3 meters (3.5 to 4 feet) apart, facing the long edge of the mat.
- Turn the right foot out 90 degrees and the left foot in slightly. Line up the right heel with the left heel or arch.
- Bend the right knee over the right ankle, aiming the knee toward the little-toe side of the foot.
- Press the outer edge of the back foot down and keep the back leg straight and active.
- Keep the torso upright, centered between the legs, pelvis facing the long edge of the mat.
- Extend the arms at shoulder height, palms down, reaching evenly in both directions.
- Turn the head to look past the front middle finger. Repeat on the other side.
Common mistakes
- Front knee collapsing inward toward the big toe.
- Torso leaning over the front leg.
- Shoulders lifting toward the ears as the arms tire.
Make it easier
- Shorten the stance so the front knee bends less.
- Rest the hands on the hips.
Go further
- Bend the front thigh toward parallel with the floor.
- Stay for 10 or more breaths to build endurance.
- Flow into Reverse Warrior, arching the front arm up and back.
Skip or modify if: you have knee or hip pain, or a neck problem; shorten the stance and keep the gaze forward rather than turning the head.
Triangle Pose
Utthita Trikonasana oo-TEE-tuh trik-oh-NAHS-uh-nuh
- Meaning
- Extended triangle pose
- Level
- Beginner
- Hold
- 5–8 breaths per side
- Works
- Hamstrings, inner thighs, side body, legs, spine
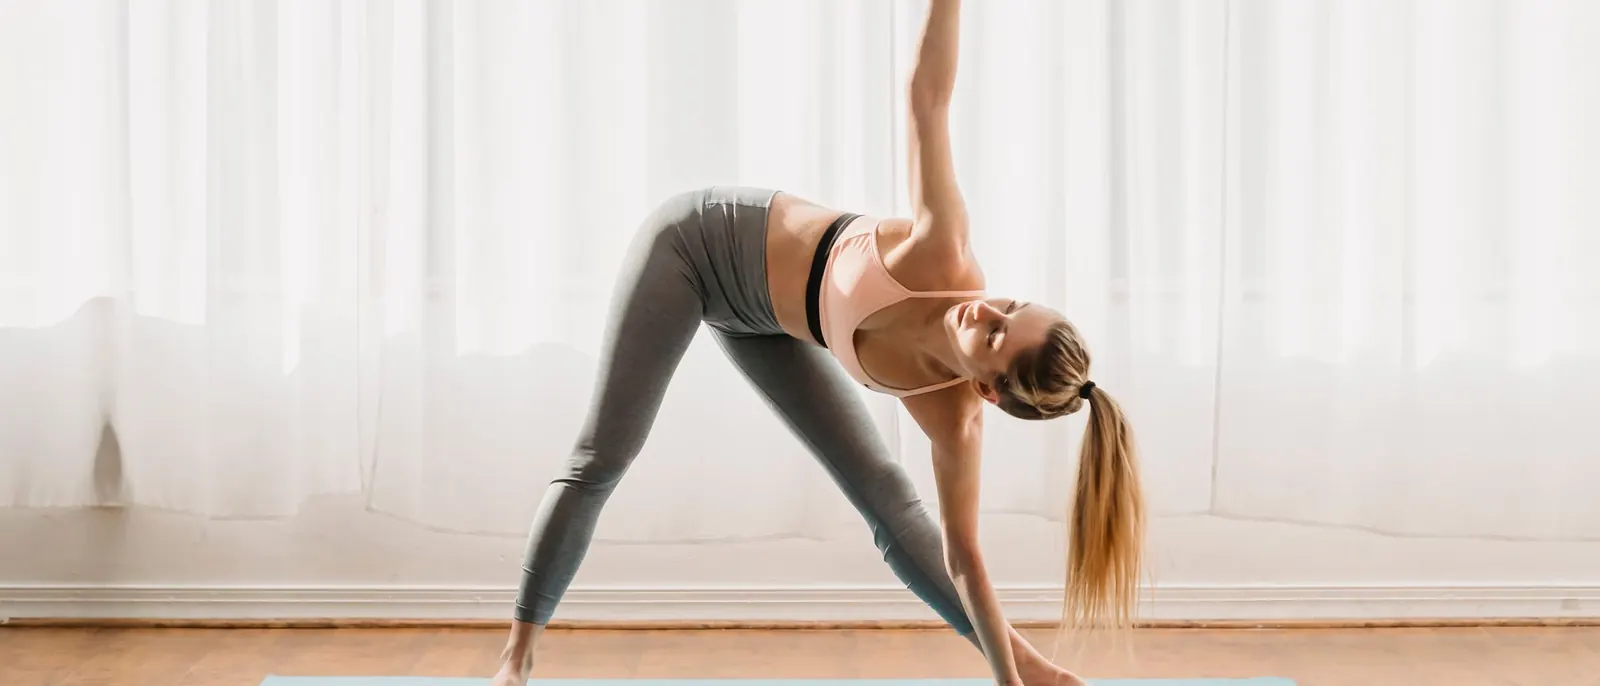
Triangle keeps both legs straight and tilts the torso sideways over the front leg. It stretches the hamstrings and side waist and strengthens the legs and trunk. The aim is length along both sides of the body, so a block under the hand is often better than reaching the floor.
How to do it
- Take a stance slightly shorter than Warrior II, right foot turned out 90 degrees, left foot turned in slightly.
- Keep both legs straight but not locked. Microbend the front knee if it tends to hyperextend.
- Extend the arms at shoulder height and reach the torso forward over the right leg, shifting the hips back to the left.
- Tilt from the hip and bring the right hand to the shin, a block or the floor outside the foot.
- Stack the left shoulder over the right and reach the left arm straight up.
- Lengthen both sides of the waist equally, crown reaching forward.
- Look forward, down or up at the top hand, whichever is comfortable for the neck. Rise on an inhale and repeat on the other side.
Common mistakes
- Pressing the lower hand into the knee joint.
- Collapsing the bottom side of the waist to reach the floor.
- Locking the front knee.
Make it easier
- Put a block under the lower hand, at any height.
- Practice with the back against a wall.
Go further
- Reach the top arm over the ear, alongside the head.
- Try Revolved Triangle (Parivrtta Trikonasana) once the basic pose is steady.
Skip or modify if: you have low blood pressure, neck problems or hamstring injuries; keep the gaze down and use a high block.
Extended Side Angle
Utthita Parsvakonasana oo-TEE-tuh parsh-vah-koh-NAHS-uh-nuh
- Meaning
- Extended side angle pose (parsva, side; kona, angle)
- Level
- Beginner
- Hold
- 5–8 breaths per side
- Works
- Legs, glutes, inner thighs, side body, shoulders
Extended Side Angle starts from Warrior II and leans the torso over the bent front leg, creating one long line from the back foot to the fingertips. It combines the leg work of Warrior II with a strong stretch through the side of the body.
How to do it
- Come into Warrior II with the right knee bent.
- Reach the torso forward over the right thigh, keeping both sides of the waist long.
- Rest the right forearm on the right thigh, or place the hand on a block or the floor outside the right foot.
- Keep the right knee pressing gently into the arm so it stays over the ankle.
- Press through the outer edge of the back foot and keep the back leg straight.
- Sweep the left arm overhead alongside the ear, palm facing down.
- Rotate the chest toward the ceiling and look up, forward or down as the neck allows. Repeat on the other side.
Common mistakes
- Sinking heavily onto the forearm and letting the shoulder shrug.
- Back foot lifting on the outer edge.
- Chest rolling toward the floor.
Make it easier
- Keep the forearm on the thigh.
- Keep the top hand on the hip.
Go further
- Bring the hand to the floor inside or outside the front foot.
- Try a bound variation, wrapping the top arm behind the back.
Skip or modify if: you have knee, hip or shoulder injuries, or neck pain; keep the forearm on the thigh, the top hand on the hip and the gaze down.
Wide-Legged Forward Fold
Prasarita Padottanasana pruh-suh-REE-tuh pah-doh-tahn-AHS-uh-nuh
- Meaning
- Intense stretch with spread feet
- Level
- Beginner
- Hold
- 5–10 breaths
- Works
- Hamstrings, inner thighs, calves, spine
With the feet wide apart and the torso folding between the legs, this pose stretches the hamstrings and inner legs with a stable, symmetrical base. Because the head hangs below the heart, it has some qualities of a mild inversion without weight on the arms.
How to do it
- Face the long edge of the mat with the feet about a leg's length apart, outer edges parallel or heels slightly wider.
- Place the hands on the hips, lift the chest and lengthen the spine on an inhale.
- Exhale and hinge forward from the hips, keeping the back long.
- Bring the hands to the floor or blocks under the shoulders, fingers in line with the toes.
- Take a halfway lift with a flat back for a breath, then fold deeper, bending the elbows straight back.
- Press through the outer edges of the feet so the arches lift.
- Let the head hang. To exit, bring the hands to the hips, press through the feet and rise with a long spine.
Common mistakes
- Rounding the back to get the head down.
- Weight drifting into the heels so the hips move back behind the feet.
- Rising too quickly and feeling light-headed.
Make it easier
- Bend the knees slightly.
- Rest the hands on blocks or a chair seat.
Go further
- Interlace the hands behind the back and let the arms fall overhead.
- Rest the crown of the head lightly on the floor if it reaches without strain.
Skip or modify if: you have glaucoma, uncontrolled high blood pressure or lower-back problems; keep the head above the heart with hands on a chair and a flat back.
Chair Pose
Utkatasana oot-kuh-TAHS-uh-nuh
- Meaning
- Fierce or powerful pose (utkata, fierce, intense)
- Level
- Beginner
- Hold
- 5–8 breaths
- Works
- Quadriceps, glutes, calves, core, shoulders
Chair Pose is a squat-like position with the knees bent, hips back and arms raised, as if sitting on an invisible chair. It is one of the most direct ways to build leg strength in yoga and warms the body quickly. It opens every round of Sun Salutation B.
How to do it
- Stand with the feet together, or hip-width apart for more stability.
- Bend the knees and send the hips back and down as if sitting.
- Keep the weight in the heels enough that you could lift the toes.
- Keep the knees together (or hip-width) and pointing forward, not splaying apart.
- Lean the torso forward slightly so the spine stays long, lower ribs drawn in.
- Raise the arms overhead, shoulder-width apart, or in line with the ears.
- Breathe steadily. To exit, press through the feet and straighten the legs on an inhale.
Common mistakes
- Knees shooting far forward with the weight in the toes.
- Arching the lower back to keep the torso upright.
- Shrugging the shoulders toward the ears.
Make it easier
- Bend the knees less.
- Keep the hands on the hips or at the chest.
- Practice with the back against a wall.
Go further
- Sink until the thighs approach parallel with the floor.
- Add a twist, hooking one elbow outside the opposite knee.
- Squeeze a block between the thighs.
Skip or modify if: you have knee pain, ankle injuries or low blood pressure; bend the knees less and keep the arms low.
Pyramid Pose
Parsvottanasana parsh-voh-tahn-AHS-uh-nuh
- Meaning
- Intense side stretch pose
- Level
- Beginner
- Hold
- 5–8 breaths per side
- Works
- Hamstrings, calves, hips, balance
Pyramid is a forward fold over a straight front leg with the hips squared forward. It gives one of the most focused hamstring stretches among standing poses. The narrow base also asks for balance, which is why a wider stance and blocks help so much.
How to do it
- From Mountain Pose, step the left foot back about 1 meter (3 feet) and turn it in 30–45 degrees.
- Set the feet hip-width apart side to side so the stance is stable.
- Square the hips to the front, drawing the right hip back and the left hip forward.
- Place the hands on the hips, lift the chest and lengthen the spine on an inhale.
- Exhale and hinge forward from the hips over the front leg, keeping the back long.
- Bring the hands to blocks or the floor on either side of the front foot.
- Keep both legs straight but not locked, and weight balanced between the front and back foot. Rise with a long spine and repeat on the other side.
Common mistakes
- Rounding the back to bring the head to the knee.
- Locking the front knee.
- Feet lined up heel to heel, which makes balance hard.
Make it easier
- Use two blocks at their highest height.
- Keep a slight bend in the front knee.
- Shorten the stance.
Go further
- Take the hands into reverse prayer behind the back, or hold opposite elbows.
- Fold the torso lower along the front thigh while keeping the spine long.
Skip or modify if: you have a hamstring injury, lower-back problems or high blood pressure; fold only halfway with hands on high blocks or a chair.
Sequencing standing poses
Standing poses fit early in a practice, after a warm-up and before seated work, backbends and inversions. A practical order moves from symmetrical to one-sided, and from hips-open to hips-square poses, so you are not twisting the pelvis back and forth on every transition. Practice the whole one-sided chain on the right, then on the left, and step to Mountain Pose between sides to reset. Finish with a forward fold to release the legs.
This mini-sequence takes about 12 minutes including a short warm-up.
- 3 minSun Salutation AThree slow rounds, knees down if needed.
- 1 minMountain PoseFind even weight in both feet.
- 1 minChair PoseTwo holds of 5 breaths, standing between.
- 2 minWarrior II to Extended Side Angle5 breaths in each, right side then left.
- 1 minTriangle Pose5 breaths each side, block under the hand.
- 2 minWarrior I to Pyramid PoseStraighten the front leg and fold. 5 breaths in each, both sides.
- 1 minWide-Legged Forward FoldHead down, rise slowly.
- 1 minMountain PoseStand still and notice the legs.
For balance work that builds on these poses, continue to Balance Poses. For full practice plans, see Practicing at Home.
Related pages
 PosesSun SalutationThe flowing warm-up that links Mountain, Chair and Warrior I with the breath.
 PosesBalance PosesTree, Warrior III and Half Moon build directly on standing-pose strength.
 Body & HealthAnatomy & AlignmentHow the hips, knees and feet move in lunges and folds.
 PosesPose LibraryEvery pose in the guide, filterable by family and level.